
Introduction
This article will begin to do one of the basic operations with the OpenCV library. You’ll see how to draw geometric shapes and add text over an existing image.
In order to follow the examples in this article you must have installed opencv library for Python. For those who have not yet installed it, I highly recommend you follow the instructions in the following article:
- OpenCV 3.0 & Python – Installation on Raspberry (Raspbian)
- OpenCV 3.0 & Python – Load, View and Save images on Raspberry
The following examples are all run on Raspberry Pi 3 Model B
Draw on an image with OpenCV
One of the basic operations of OpenCV is the ability to draw over the image. The ability to add lines, circles and geometric shapes over an image is an operation that will prove very useful later.
Often working with image analysis, you want to highlight a portion of the image, for example by adding a rectangle that defines that portion, for example, or an arrow to indicate that. Other examples could be for example the addition of a grid, or the addition of a contour which demarcates a figure, etc ….
During this article you will see that these operations can be performed using simple functions, each specialized for a given basic geometrical figure. These functions accept the topics in which the geometric coordinates are specified that define the figures. These basic geometric shapes are often called as primitive and are crucial figures such as points, lines, circles, rectangles that allow the construction of more complex geometric figures.
You’ve already worked with other programming languages to design, you will find this series of commands very easy and intuitive. If you’re not familiar with this type of commands, you do not have to worry as in the following examples, each command will be explained in detail and step by step.
Before starting
Open a terminal session and make starting the virtual environment where you installed OpenCV 3.0 for Python.
$ source ~/.profile
$ workon cv
(cv) $
For convenience, this example will use a black background where you build geometric shapes. Create a draw01.py file with a text editor.
$ nano draw01.py
and copy the following code
import numpy as np
import cv2 as cv

img = np.zeros((512,512,3), np.uint8)

cv.imshow('Draw01',img)
cv.waitKey(0)
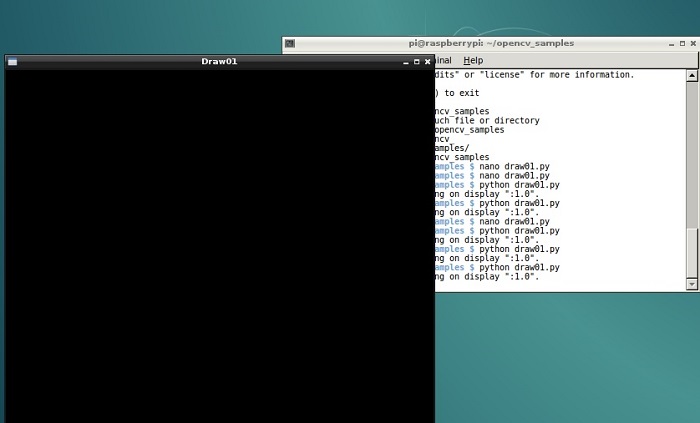
This will be the starting code of the examples to follow. If you run the code you will get a window with a completely black background.
$ python draw01.py
Draw a line
First you’ll see how you can draw a line. The function to draw a line on the screen is cv2.line. This function takes five arguments:
- image object on which to draw
- starting point coordinates (x, y)
- end point coordinates (x, y)
- stroke color in BGR (not RGB, be careful!)
- stroke thickness (in pixels)
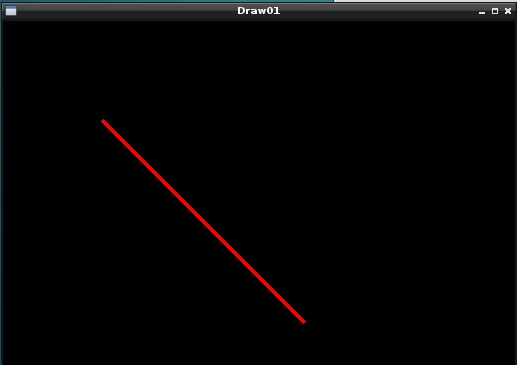
For example, to add a red diagonal line with a thickness of 4 pixels. Simply add the row
img = cv.line(img, (100,100), (300,300), (0,0,255),4)
in the preceding code, immediately after the definition of img.
import numpy as np
import cv2 as cv

img = np.zeros((512,512,3), np.uint8)

#draw a red line
img = cv.line(img, (100,100), (300,300), (0,0,255),4)

cv.imshow('Draw01',img)
cv.waitKey(0)
Running the program you will see the red line.
Draw a Rectangle
To draw a rectangle, the function is very similar and is called cv2.rectangle. Even this function accepts five input parameters:
- image object on which to draw
- coordinates of the vertex at the top left (x, y)
- coordinates of the lower right vertex (x, y)
- stroke color in BGR (not RGB, be careful)
- stroke thickness (in pixels)
Thus, add the following row to the preceding code.
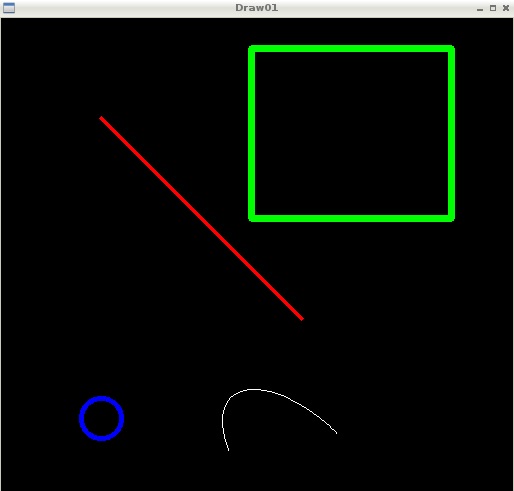
img = cv.rectangle(img, (250,30), (450,200), (0,255,0), 5)
You’ll get a green rectangle in the upper right.
Draw circles and ellipses
In a very simple and similar to previous you can draw ellipses and circles through cv2.circle and cv2.ellipse functions.
The circle() function takes five arguments:
- image object on which to draw
- center coordinates (x, y)
- radius of the circle
- stroke color in BGR (not RGB, be careful)
- stroke thickness (in pixels)
Here is an example of a blue circle of radius 20 and with 3 pixels of thickness.
img = cv.circle(img, (100, 400), 20, (255,0,0), 3)
Instead the ellipse () function is a bit ‘more complex than the previous ones and requires 8 arguments:
- image object on which to draw
- center coordinates (x, y)
- length of the minor and major axes (h, w)
- rotation angle of the ellipse (calculated counterclockwise)
- starting angle (calculated clockwise)
- final angle (calculated clockwise)
- stroke color in BGR (not RGB be careful)
- stroke thickness
Here is an example of a white-colored arch of ellipse rotated by 45 degrees.
img = cv.ellipse(img, (300, 450), (100, 50), 45, 130, 270, (255,255,255), 1)
Enter the two lines in draw01.py code and you’ll get the following result:
Draw a polygon
Finally, among the primitives, the more complex shape is polygon. Since a polygon can have n vertices (n can take any integer value) and the polygon requires no arguments to be represented. You can use an array, to represent n points with coordinates (x, y) as the argument of a function,. This makes it so much easier.
You can use the cv2.polylines function. This function needs of a number of arguments as
- the image object on which to draw
- the array of coordinates
- True, if it is a closed line
- stroke color
- stroke thickness
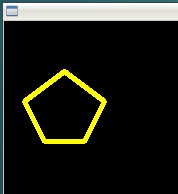
For example you can draw a yellow pentagon.
vrx = np.array(([20,80],[60,50],[100.80],[80,120],[40,120]], np.int32)
vrx = vrx.reshape((-1,1,2))
img = cv.polylines(img, [vrx], True, (0,255,255),3)
You can put the above lines in the code by replacing the previous commands, so obtaining the following figure:
Draw geometric figures on images
Now that you’ve seen how easy it is to draw geometric shapes and which functions and parameters are necessary to define them, the next step will be the ones to add them directly over an image. The images can be of any format. For this example, you can use the logos.jpg image already used in previous tutorials. (Download it directly from the image below).
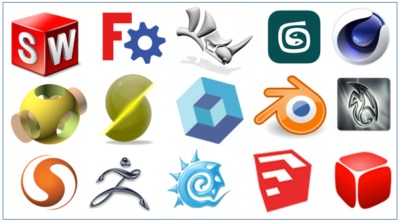
Then loads the image with OpenCV (if you want to explore this topic I recommend you read the first part of this series of articles). Open a text editor and create draw02.py file.
import numpy as np
import cv2 as cv

img = cv.imread('logos.jpg')
img = cv.rectangle(img, (250,70), (330,150), (0,255,0), 4)

cv.imshow('Draw01',img)
cv.waitKey(0)
As you can see the code will draw a green rectangle around one of the icons below.

Write text on images
Last part of this article is about writing text on the images. In fact, many times not only the geometric shapes are useful for adding information on an existing image, but also the texts can add a lot of information.
The underlying principles are the same. But before you add the actual text from a quick glance at the FONT that OpenCV provides you with. These fonts are defined through an enumeration.
FONT_HERSHEY_SIMPLEX = 0,
FONT_HERSHEY_PLAIN = 1,
FONT_HERSHEY_DUPLEX = 2,
FONT_HERSHEY_COMPLEX = 3,
FONT_HERSHEY_TRIPLEX = 4,
FONT_HERSHEY_COMPLEX_SMALL = 5,
FONT_HERSHEY_SCRIPT_SIMPLEX = 6,
FONT_HERSHEY_SCRIPT_COMPLEX = 7,
Take one of these, for example the first one and add it to the code:
font = cv.FONT_HERSHEY_SIMPLEX
Then to draw the text with OpenCV there is cv2.putText function that accepts a number of arguments:
- the image on which to draw
- the text to be written
- coordinates of the text start point
- font to be used
- font size
- text color
- text thickness
- the type of line used
So if you want to add a text to the logos.jpg image, write the following line, adding it to the code.
cv.putText(img, 'This one!", (230, 50), font, 0.8, (0, 255, 0), 2, cv.LINE_AA)
Run the code and you will get the following picture.

Conclusions
With this simple article you saw how to add figures and text on the image using the OpenCV library. In subsequent articles you will discover this basic operation is very important and essential, and will help to highlight your achievements during image analysis.[:]