Introduction
This article will begin to work with images, by performing arithmetic operations on them.
In order to follow the examples in this article you must have installed opencv library for Python. For those who have not yet done so I highly recommend you follow the instructions in the following article
- OpenCV 3.0 & Python – Installation on Raspberry (Raspbian)
- OpenCV 3.0 & Python – Load, View and Save images on Raspberry
- OpenCV 3.0 & Python – Drawing shapes and text on images
The following examples are all run on Raspberry Pi 3 Model B
Before starting
Open a terminal session and make starting the virtual environment where you installed OpenCV 3.0 for Python.
$ source ~/.profile
$ workon cv
(cv) $
Create a draw03.py file with a text editor.
$ nano draw03.py
and copy the following code
import numpy as np
import cv2 as cv
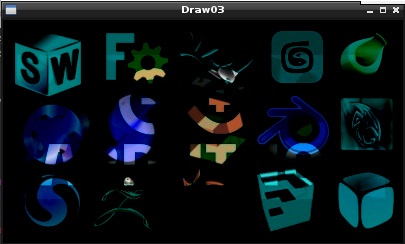
img1 = cv.imread('logos.jpg')
cv.imshow('Draw03',img1)
cv.waitKey(0)This will be the starting number of the following examples. Before you run it, download the image files in the following figure if you have not already done so. Save it as logos.jpg.

In addition to carrying out the examples in this article you will need to use another image file. Download the following image and save it as arduino.jpg.

If you run the code you will get a window containing the logos.jpg image.
$ python draw03.py
Elementary operations on images
The basic operation to use two images is addition. You can make the addition of two images with the cv2.add() function. The result obtained will be the combination of the two images. Important to add that the two images must match perfectly in size.
img2 = cv.imread('arduino.jpg')
img = cv.add(img1,img2)

cv.imshow('Draw03',img)
By running the program, you will receive a combination of the two images. Unfortunately, the effect is not very appealing.

The result is not quite what we expected. The prevalence of white is in fact the result of the simple arithmetic sum of the three RGB values, which is calculated for each individual pixel.
In fact, you know that each of the three RGB components takes values from 0 to 255. So if the sum of the values of a given pixel is greater than 255 (which is quite likely) the value will still be 255. So the simple task of adding the images does not lead to an image which is the merger of the two, but the progressive shift gradually more and more towards the white.
Later you will see how the concept of addition of two images is to create a new image that is half of the two (it is not the arithmetic sum).
You can do the same reasoning by subtracting two images. This operation can be performed with the cv2.subtract() function. This time we would expect an image that will tend more and more towards the black. Replace the cv2.add() function with this.
img = cv.subtract(img1, img2)
By running the program you will find a picture tending to the darkness … (even if you do not see much).

Attention, this effect will be seen better by writing
img = cv.subtract(img2, img1)
and you get a more blackish image. However, this is useful to know that the order of the operators is important for the result.
More concretely, you have already seen that an img object created by following the OpenCV library is nothing more than an array of arrays that respond perfectly to the canons of NumPy. So you can use the operations between matrices provided by NumPy, such as the addition of matrices. But be careful, the result will certainly not be the same …
img = img1 + img2

In fact, the cv2.add functions () and cv2.subtract () deal to maintain the values between 0 and 255, regardless of the value of the operators. If the sum exceeds 255 the result would be 255. The same thing if the removal would produce a negative value, the result would be 0. Instead of numpy arithmetic operations do not have this feature.
Image Blending
In the previous example you saw that the addition or subtraction of two images does not produce an intermediate image between the two, but the result of tending the coloration toward whites or to blacks.
The correct operation is called blending. That is, you can consider the operation of superimposing the two images one above the other, making the one placed above gradually more and more transparent. By adjusting the transparency gradually you get gradually a mixture of the two images, creating a new one that is the intermediate.
The blending operation does not correspond to the simple addition, but the formula corresponds to the following equation.
img = α ⋅ img1 + (1 – α ) ⋅ img2 with 0 ≥ α ≥ 1
As you can see the two images have two numerical coefficients that take values between 0 and 1. With the growth of the α value you will have a smooth transition from the first image to the second image.
The OpenCV library allows the operation of blending and provides the cv2.addWeighted () function in this regard.
Let’s say you want the intermediate image between the previous two, then you will need to write
img = cv.addWeighted(img1, 0.5, img2, 0.5, 0)
The result will be like the following picture.

Conclusions
In this article you’ve seen how to properly add two images through the image blending. Other posts on the OpenCV library will show you many other operations to be applied to images, gradually discovering the wonderful world of images analysis.
[:]