
Introduction
The world IoT (Internet of Things) is becoming increasingly popular in the world around us. We are still fascinated by this world of sensors and microprocessors that are increasingly interfacing more in our daily lives. If you are reading this article you probably know Arduino UNO and how it has revolutionized our lives, both as makers and as geeks of various kinds … Well Arduino has developed a new much more specialized board for IoT: the MKR1000
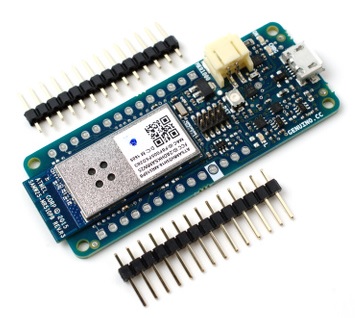
Arduino-Genuino MKR1000
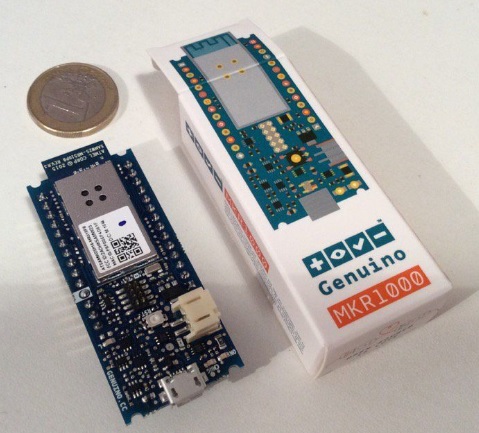
Arduino MKR1000 (or for us in Italy Genuine MKR1000) is the new Arduino flagship product. MKR1000 is designed to combine the functionality of an Arduino Zero with the Shield WiFI. Thus this board is the solution for many IoT projects harnessing the power of the Arduino with all the functionality derived from the network connection.
The key features of this board are:
- the small size
- the low power consumption
- WiFi
Its small size makes it suitable to be easily mounted in small containers or in projects that require small spaces. This makes it easier for those who are dealing with IoT projects, where the weight and volume are often important factors to be reckoned with.
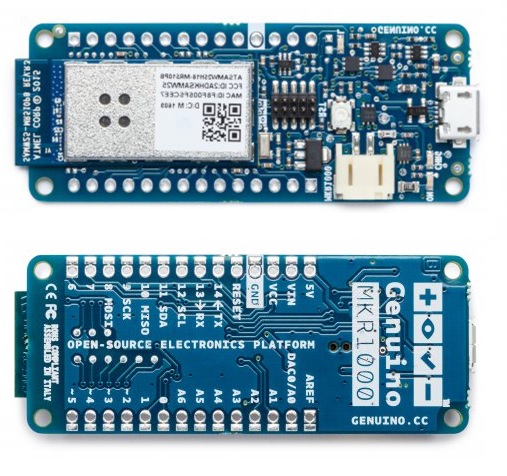
The low consumption is guaranteed by a new internal electronics. In fact, the SoC (system on chip) on which it is based is the Atmel ATSAMW25. This is a chip belonging to SmartConnect family, specifically designed for IoT projects. This chip consists of three main components:
- SAMD21 Cortex-MO+ 32 bit
- WINC1500 2.4GHz IEEE 802.11 Wi-Fi
- ECC508 CryptoAuhentication
Also it includes a WiFi antenna.
The low power consumption ensure long life with battery power. In fact with the MKR1000 a new power supply-charging system has been proposed. In fact, the board also includes a charging circuit that allows the power supply both by a Li-Po battery and by an external 5V power supply. Moreover the recharging the Li-Po battery while the board is connected with the external power supply. The switching from a supply type to the other takes place automatically. Then you can use the USB port for power.
As regards the price is not very different from previous ones, and is between 30-40 euro.
| Arduino MKR1000 Wifi |
Using Arduino/Genuino MKR1000
If you are already familiar in working with other Arduino boards, you will not find any difficulty to work well with this card. In fact, its use does not differ absolutely from the earlier cards.
However, the only difference is that you have to take into account is that the I/O pins mounted on MKR1000 work on 3.3V, differently from previous Arduino boards. Then, the application of higher voltages may lead to board malfunction. Thus, when you have to work with sensors or instrumentation requiring 5V, you should use an LLC (Logic Level Converter). There are many commercially available LLC. For example, there are modules for two-way communication with 3.3V-5V conversion released by SparkFun and Adafruit.
| Adafruit Logic Logic Level Converter 5V to 3.3V | |
| SparkFun Logic Level Converter 5V to 3.3V | |
| Logic Level Converter 5 V to 3.3 V |
Arduino IDE Software, a common development environment for all of Arduino boards, the remains of your software development tool. But before you start working with MKR1000 you have to add the Atmel IDE SAMD Core to the IDE. Select the menu item Tools > Boards> Boards Manager and install the addin.

Now you can install the drivers for the card MKR1000
On Linux – driver installation is not required.
On OSX – driver installation is not required.
On Windows (7.8 and 10). Connect the MKR1000 board to the computer via a USB cable. Once connected, Windows should automatically start the driver installation process, but not being able to find it will ask you for its location. Go to Start menu, open the Control Panel and go to System & Security. Click on System, and open the Device Manager. Search Ports (COM & LPT). There should be a generic USB port relative to MRK1000.

Please right-click this item and choose “Update Driver Software“.

Look for the Arduino IDE folder in the file system. Then look for the Drivers folder (non FTDI USB Drivers). Press OK and then Next to install the driver.
If everything went correctly, this time the computer should recognize the board via the USB port and show “Arduino MKR1000” correctly.

On the Arduino official website you can find all the information you need and much more
Technical feature
| Microcontroller | SAMD21 Cortex-M0+ |
| Operating Voltage | 3.3 V |
| Input Voltage (recommended) | 5 V |
| Digital I/O Pins | 8 |
| PWM Digital I/O Pins | 4 |
| Analog Input Pins | 6 |
| Analog Output Pins | 1 |
| Flash Memory | 256 Kb |
| SRAM | 32 Kb |
| Clock Speed | 48MHz |
Conclusions
I also ordered a MKR1000 with the will to go deeper into this subject, in particular with regard to the Internet of Things, developing some projects,. Any of you who wants to participate or has some projects to put on display, all you must do is contact the Meccanismo Complesso sending us an email. Bye![:]