
The DHT11 sensor (and the DHT22 sensor) allows to measure both the temperature and the humidity level in the air. Present on the market for a few euros, we find it already mounted on electrical boards that greatly facilitate its use. Let’s see in this article how easy it is to connect this sensor to our Raspberry Pi and how to take measurements.
[wpda_org_chart tree_id=32 theme_id=50]
The DHT11 and DHT12 sensors
This small sensor has been reaping a lot of success lately due to its low cost and ease of use. The ability to measure both temperature and humidity make it very useful in applications such as weather stations, probes for soil analysis and home automation systems.
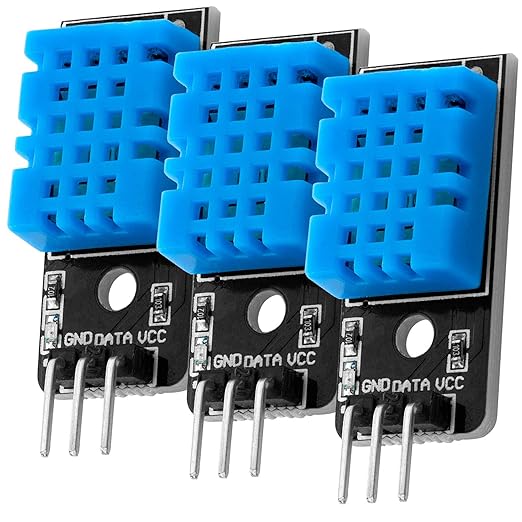
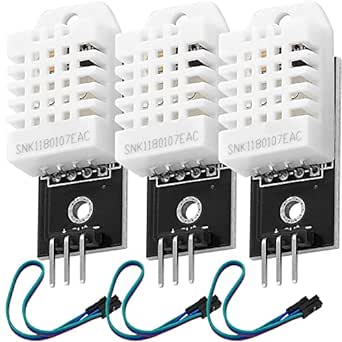
As mentioned above, we find this sensor on the market already integrated on a small module that greatly facilitates the task of connections. In fact, no soldering will be necessary, nor take into account the addition of other electronic components such as resistors. It will be sufficient to connect with simple jumper cables to the 3 or 4 output connectors. Let’s see them in detail
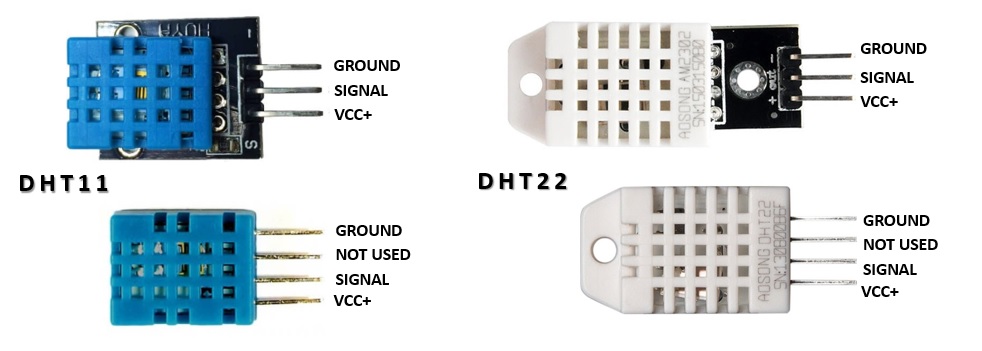
As we can see from the photo, the two models are easily distinguishable from each other. The DHT11 has a blue colored case while the DHT22 has a white colored case. The DHT11 is cheaper, however, at the expense of less precision and less resistance. Furthermore, if measurements at the extremes of the relative humidity scale (0-20% and 80-100% humidity) are required, DHT22 must be used.
Below is a table with the operating margins of the two sensors in comparison
| DHT11 | DHT22 | |
| Humidity Range | 20-90% RH | 0-100% RH |
| Humidity Accuracy | ±5% RH | ±2% RH |
| Temperature Range | 0-50 °C | -40-80 °C |
| Temperature Accuracy | ±2% °C | ±0.5% °C |
| Operating Voltage | 3.3V to 5.5V | 3.3V to 6V |
| Reading time | 6-10 sec | 2 sec |
Recommended Product:
Recommended Product:
Relative humidity
We have seen that the DHT11 and DHT12 sensors allow us to measure at the same time the values of temperature and humidity, or more precisely of relative humidity. But what is relative humidity?
Relative humidity is the amount of water vapor present in the air relative to the saturation point of water vapor in the air. At the saturation point, the water vapor begins to condense and accumulate on the surfaces, forming drops of moisture.
The saturation point varies according to the air temperature. Cold air can hold a smaller percentage of water vapor, while warmer air is able to hold more and more before reaching saturation.
The equation for calculating relative humidity is as follows

where  is the density of water vapor, while
  is the density of saturated water vapor.
Relative humidity is expressed in percentages, so condensation occurs at 100% humidity and completely dry air at 0%.
How DHT11 and DHT22 sensors measure temperature and humidity
The DHT11 sensor as well as the DHT22 detect the presence of water vapor by measuring the electrical resistance between two electrodes. The moisture sensitive component is a substrate capable of retaining moisture, with the electrodes applied to the surface. When water is absorbed by the substrate, ions are released from the substrate which thus increases the conductivity between the two electrodes. The variation in resistance between the two electrodes is proportional to the relative humidity. The higher the relative humidity, the lower the resistance between the two electrodes, while the lower the relative humidity, the greater the resistance between the two electrodes.
While for the temperature, the DHT11 sensor measures it thanks to the presence of an NTC temperature sensor (thermistor) mounted on it.
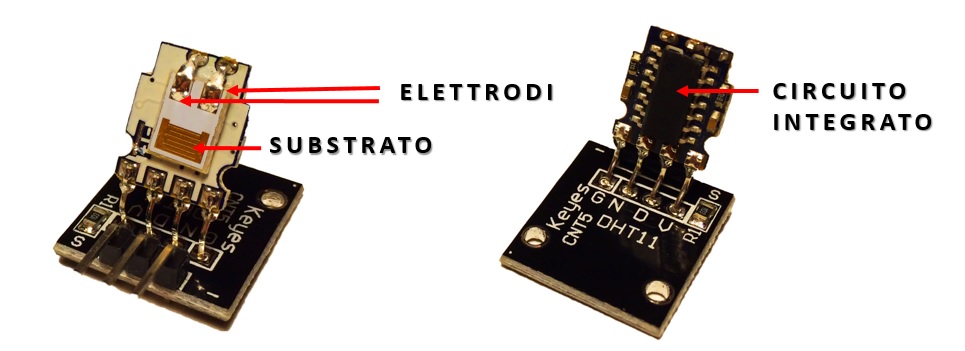
If you remove the plastic case that protects the sensor, you can see the two electrodes applied to the substrate on one side of the printed circuit, while on the other side we have an integrated circuit (IC) that has the task of converting the measurements of resistance in relative humidity. Furthermore, this IC contains inside the calibration coefficients, and controls the data transmission between the DHT sensor and the outside.
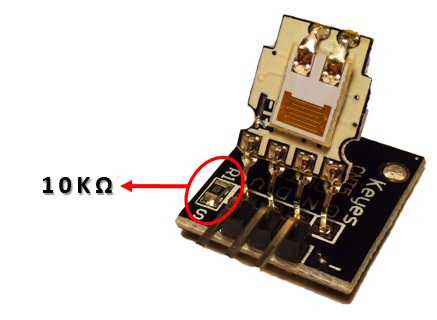
If the DHT11 sensor is mounted on a base with only 3 pins coming out, then there will already be a 10KΩ pull-up resistor on it. This needs to be present between the signal line and the 5V supply, to ensure that the signal level remains high by default. If, on the other hand, you have the sensor module alone (the one with 4 output pins and without base) then we will have to add the pull-up resistor by ourselves.
How to connect the DHT11 to the Raspberry Pi
We have seen that the DHT11 (as well as the DHT22) can be found on the market in two different versions, with or without a base. If the DHT11 sensor with the base has been purchased, the 10KΩ resistance is included, and therefore it can be connected directly to the Raspberry Pi pins according to the following diagram.

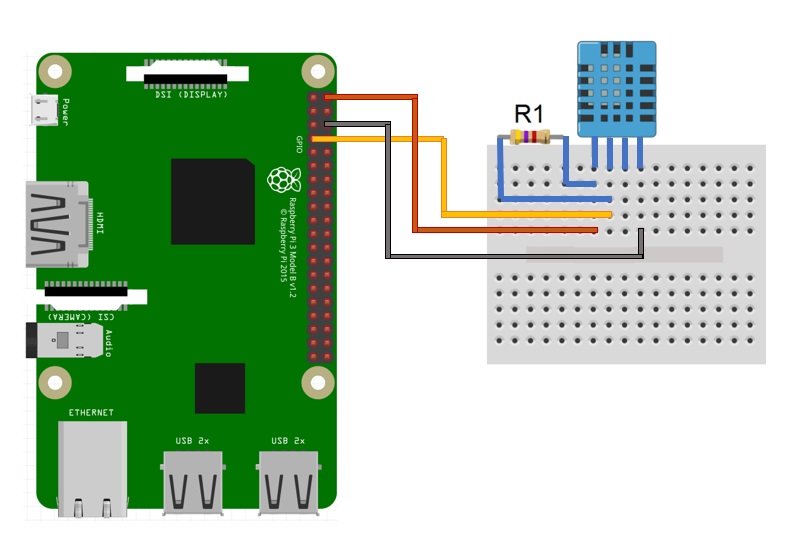
If, on the other hand, you have the version of the DHT11 sensor without base, we are dealing with 4 pins and a 10KΩ resistor to add to the connection between the Vcc and the signal pin, following the following diagram.
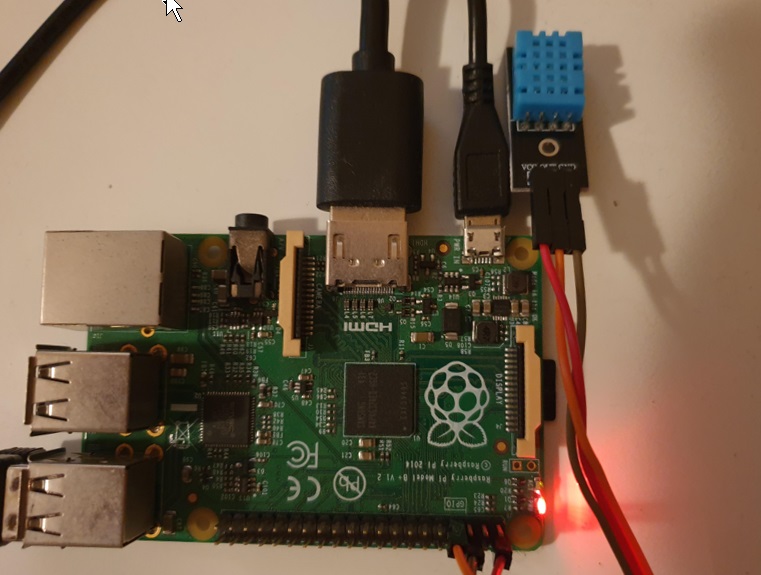
In my case, I have a DHT11 sensor equipped with a base. So I make direct connections between the Raspberry GPIO and the 3 connectors on the base, without worrying about inserting a resistor. Here is a photo of my case.
We program Raspberry to show the values on the terminal
In order to work with DHT sensors at their best, we will download the Adafruit_DHT library distributed by Adafruit. To download it you can use Git which is already installed on Raspberry. Then enter the following command.
git clone https://github.com/adafruit/Adafruit_Python_DHT.git
Once the library has been downloaded to the Raspberry file system, we move to the library directory.
cd Adafruit_Python_DHT
Now install the library
sudo python setup.py install
Now that everything has been installed, we can write a script in Python that will allow us to read temperature and relative humidity directly from the DHT11 sensor in real time. We then create a dht11.py file.
sudo nano dht11.py
And then let’s write the following code inside:
#!/usr/bin/python
# -*- coding: utf-8 -*-

import sys
import Adafruit_DHT

#for DHT11
sensor = 11
#for DHT22
#sensor = 22

gpio = 4

humidity, temperature = Adafruit_DHT.read_retry(sensor, gpio)

if humidity is not None and temperature is not None:
    print 'Temp: {0:0.1f}°C  Humidity: {1:0.1f} %'.format(temperature, humidity)
else:
    print 'Failed to get reading. Check the sensor connection!"
    sys.exit(1)
If we check the script in detail, we see the read_retry() function of the Adafruit_DHT library that receives two parameters. The value 11 indicates that the sensor used is DHT11 (if it had been the DHT22 you should have entered 22). The second parameter, in this case 4, is the GPIO number (not the pin) to which the sensor is connected.
Instead of writing the following script, you can achieve the same result by directly running the AdafruitDHT.py file and passing it the same arguments as we talked about above.
cd examples
sudo ./AdafruitDHT.py 11 4
Executing in both cases, the following output is obtained (the reading values, of course, will be different).
Temp=21.0* Humidity=75.0%
NOTE: You must keep in mind that the sensor is able to take a reading approximately every 10 seconds for the DHT11 and every 2 seconds for the DHT22, so it is not possible to use a FOR loop to request more measurements in less time.