
Flask is a Python mini-framework that is used for web development. Thanks to its small size and its great capabilities, Flask is a great tool for creating your own websites dynamically and interactively. With its high versatility and simplicity, it is a great solution for implementing a web server on Raspberry Pi.
In this article you will see how to install Flask on our Raspberry Pi and then some basic concepts will be illustrated with some examples in order to get started working on it.
[wpda_org_chart tree_id=29 theme_id=50]
Prerequisites before installing Flask
Create a new Raspian dedicated environment (a new SD card)
To avoid conflicts and start working in a clean environment, I highly recommend using a new environment for Flask installation, creating a new SD card.
In this way, it will be possible to clone the environment on which you are working on (SD card cloning) in a few minutes, and restore everything quickly and easily, especially if you can make mistakes 😉 ).
In this example you will refer to Python 3.
For reference, I suggest to read this HOW-TO that might be useful to you:
Enable SSH
As default configuration, Raspberry has SSH disabled, so if you want to access remotely to the system, you will need to enable it.
Create an empty file in the boot partition and call it ssh.
Otherwise you can use the raspi-config utility to enable SSH.
In order to do this in the best way, I suggest you to visit this HOW-TO:
Find the IP address
In order to work with Flask, you need to know the IP address of your Raspberry Pi. Thus, launch the command
ifconfig
Most likely your IP address will be similar to 192.168.x.x
Change the password
When you enable SSH on your Raspberry, you actually open an access door to your system. Thus it is necessary to change the default password “raspberry” with a different one.
To change the password on Raspbian, launch the command:
passwd
Expand File System
Another operation you have to do whenever you install a new Raspbian image on a SD card, is to expand the file system. In fact, often the space on the SD card is far bigger than the one set in the image you downloaded.
So for not wasting memory space, you have to expand the file system, launching the command:
sudo raspi-config
Select Advanced and then Expand Filesystem.
Update the system
It is natural that the image you have installed on the SD card is certainly not the latest one, but it dates back to when it was released. To update Raspbian to the latest version, launch the following commands:
sudo apt-get update
sudo apt-get -y upgrade
This procedure could take several minutes (is the time for a pause … what do you say? 😉 )
Install pip
Once Raspbian is ready and updated, it’s time to install the package manager to install and manage all Python packages. Since you will refer to Python version 3, you have to install the corresponding pip.
From console, launch the following command:
sudo apt-get -y install python3-pip
Installing Flask
Finally you got to install Flask …. Is it a hard job?
Here is the command to start installing Flask:
sudo pip3 install flask
As you receive the “Successfully installed flask” message the installation will be terminated. Everything is going right. It was really very simple … do you find it? 😉
Developing a test site
Interesting work begins here. The first thing you have to do is creating a test site named mySite. It sounds odd, but in order to create a site with Flask, you have to create a folder. Name it as mySite.
mkdir mySite
cd mySite
Now that you are in the new directory, create a Python script and call it with the name of the site: mySite.py.
sudo nano mySite.py
Copy the following code in the file:
from flask import Flask
app = Flask( __name__ )
@app .route( "/" )
def index():
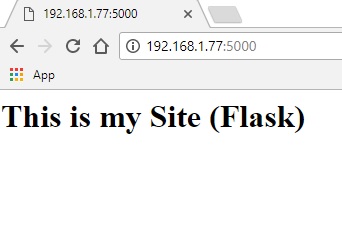
return "<html><body><h1>This is my Site (Flask)</h1></body></html>"
if __name__ == "__main__" :
app.run( host = '0.0.0.0' , debug = True )If you have HTML knowledge, you can see in the script that the web page to display is referred as a string containing the HTML code.
Now let’s launch the script
python3 mySite.py
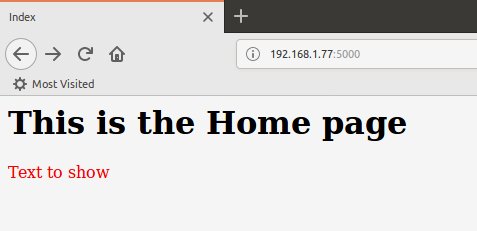
Open a browser on your system and make a search for your IP address followed by port number 5000, which is the default port used by Flask. The home page will be shown.
Flask as web application server
As you have seen so far, you’ve just made the Home Page of the site, the “index.html” just to understand. But in this case, instead of being static, the home page is generated dynamically by the Python interpreter every time it is called. The HTML page is generated from the mySite.py file.
In fact, Flask could be considered a web application server, that is, an application that can generate dynamic web pages using a programming language (in this case Python) instead of writing static HTML pages. This allows you to create web pages with variable content depending on the user choices and thus the ability to create professional sites.
Adding content pages
Now that you’ve made the Home Page, you will need to start adding the various content pages. To do this, you continue to proceed in a programmatic way, that is, through the writing of Python code.
Before you start, it is interesting to discuss a particula aspect not always discounted. Leave mySite.py running on a terminal session. Instead open a new session on another terminal for modifing the mySite.py file.
As soon as you save the file, the changes will be accepted in real time by the web server, which will be displayed immediately on the browser without interrupting the program execution. This is very convenient during the development phase.
Now, in a new terminal session apply the changes to the mySite.py file.
from flask import Flask
app = Flask( __name__ )
@app .route( "/" )
def index():
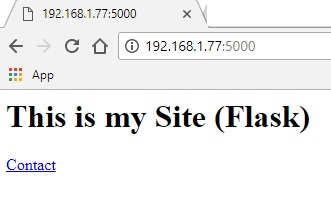
return "<html><body><h1>This is my Site (Flask)</h1><p><a href='contact'>contact</a></p></body></html>"
@app .route( "/contact" )
def contact():
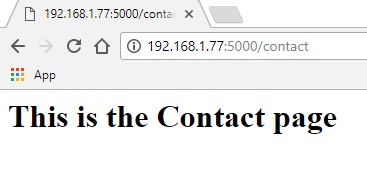
return "<html><body><h1>This is the Contact page</h1></body></html>"
if __name__ == "__main__" :
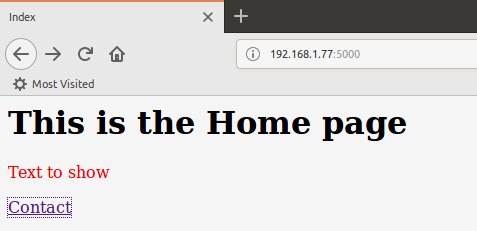
app.run( host = '0.0.0.0' , debug = True )Save the file. This time, loading again the home page from the browser, a link will appear below. This link will redirect you to the new page.
By clicking on the Contact link you will load the new page on the browser.
From the example, you can easily understand that to add pages you need to define the routes. Each route will be assigned a particular “URL” reference along with a string containing the HTML to display.
The paths to use in the HTML link should be absolute without / at the beginning.
<a href="contact">
while for routes it is necessary to enter the symbol / root of the website.
@app route( "/contact" )
in the browser this will match to
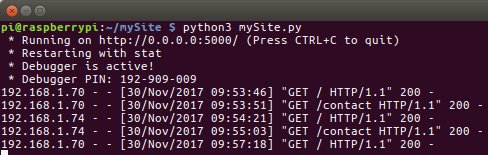
Take a look at the console where mySite.py is running. You will read a series of very useful HTTP messages and codes. These messages will help you to understand the functioning of page calls from the browser and possible code errors.
Adding multiple routes
The situation you have seen before, was just a simple example to better understand Flask’s operation and how to do routing calls from browsers. Actually, page management is a bit more complex, but it’s important for you to get it done gradually.
For example, in the actual web development is to separate static content (HTML) from dynamic content (variables and functions in Python) as much as possible. In order to manage and isolate the static content of a page (which is often repeated in several HTML pages), templates are used. While for dynamic content management there is a more programmatic approach through the use of functions and variables written in Python language. As regarding the data to send to the web pages are often structured: a good example are the Python lists.
Give a look at the previous example using this new approach, making some additions to code.
from flask import Flask, render_template
 app = Flask( __name__ )

@app .route( "/" )
def index():
     data = [ 'Index', 'Home', 'red' ]
     return render_template('template.html', data = data)

@app .route( "/contact" )
def contact():
     data = [ 'Contact', 'Contact', 'blue']
     return render_template('template.html', data = data)

if __name__ == "__main__" :
    app.run( host = '0.0.0.0' , debug = True )
As you can see in each route, the render_template() function is used to return the static HTML content of the template.html file along wiht the dynamic parts (variables) replaced with the corresponding values within the data list.
Create a new directory templates within the MySite directory.
mkdir templates
cd templates
sudo nano template.html
In fact, by default Flask will look for templates inside it. Then create the template.html file inside it.
<! DOCTYPE html>
<html>
<head>
<title>{{ data[0] }}</title>
</head>
<body>
<h1>This is the {{ data[1] }} page</h1>
<p style='color: {{ data[2] }} ;'>Text to show</p>
</body>
</html>
By running the code you will see how the values vary depending on the call page (dynamic content).
Load again the Home page from the browser
And then load the Contact page.
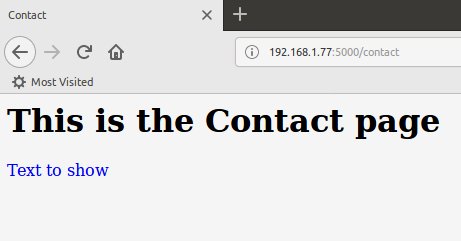
As you can see, even if the template is the same in both cases, the content shown will be different depending of the web page.
Insert conditions into templates
In the example above, you really started to understand the high potential of dynamic pages. In fact, the ability to use templates as a static base and the introduction of variables within them, makes Flask a really powerful tool. But the dynamic part of the pages is not limited to this. Many other features can be added within templates in order to create dynamic content. Among all these, conditions are perhaps the most useful and common.
Let’s see it together with a further example.
In the above example, you used a single template.html for both pages. But in doing so you lost the link to the contact page in the Home Page. This feature is only needed for the Home page, but we want to continue using only one template. How to do then?
Through the use of conditional operators. Open template.html and add the following changes.
<! DOCTYPE html>
<html>
<head>
<title>{{ data[0] }}</title>
</head>
<body>
<h1>This is the {{ data[1] }} page</h1>
<p style='color: {{ data[2] }} ;'>Text to show</p>
{% if data[1] == 'Home' %}
<p><a href='Contact'>Contact</a></p>
{% else %}
<p><a href='/'>Come back to Home page</a></p>
{% endif %}
</body>
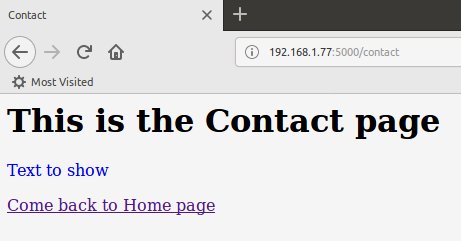
</html>Load again the home and the contact page. Now you can see that links are restored.
Debug mode
In the mySite.py script you can see that the debug option is set to True. This means that Flask is activated in Debug Mode., This means that Flask will show any error messages as long as it find any problem while loading pages. This will help you to check check Python code during the development.
When the site has reached its stability, you can remove this mode by setting the debug option to False.
Further readings
If you are interested to the web development and wish to deepen the topic, I suggest you to increase your knowledge of HTML5, JavaScript, and CSS3. In fact, many of us, although familiar with this subject, have no up-to-date knowledge. In recent years, HTML has been very up to date by creating new rules and standards to follow (HTML5) and the same for CSS and the related JavaScript.

Recommended Book:
A big deal is the time to devote to these studies. I recently had a couple of books in my hands that allowed me to upgrade to these technologies in an easy and intuitive way and in a very short time (not 24 hours …) 😉
Mentre per chi ama approfondire e sviluppare il web a 360° allora dovrà certamente aggiornarni anche per quanto riguarda JavaScript e le jQuery.

Recommended Book:
Conclusions
In this introductory article you’ve seen what Flask is and some of its basics about how to create web pages dynamically. You have also seen how easy it is to install it on Raspberry. Some basic rules for developing web pages have been shown as well.
If you’re interested in the topic, I suggest you read some online articles online for a more in-depth discussion. However, soon will be followed by some more prominent articles that will handle Web development on Flask using the Python language. Many tutorials and examples will show you how to do it. See you soon then![:]