
If you have a Raspberry Pi board, sooner or later you will be tempted to try to turn it into a web server, where you can create your web sites, with all of your pages, photos and so on. With Raspberry you can have a web server at the cost practically zero. This can also be very useful if you want to do a bit of practice with a real system. For example, if you just signed up for a Web course (CSS, HTML5 or WordPress), you certainly want to practice what you just learned. In this article you will see how to install a LAMP (Linux, Apache, MySQL and PHP), an environment which contains all the applications necessary to create a web server.
[wpda_org_chart tree_id=29 theme_id=50]
LAMP – the environment for a web server
The LAMP is a set of applications that is now well set up and validated by time. These applications are required to offer a web server, and in fact the LAMP name comes from the initials of these applications.
- Linux
- Apache
- MySQL
- Php
Let’s see one by one in detail.
Linux is the operating system. On Raspberry Pi the standard operating system is Raspbian (a version of Debian adapted for Raspberry). So as far as this first part, you already have everything set up and ready and not have to worry anymore. If you had other Linux distributions installed on Raspberry Pi, they should be fine.
Apache is an HTTP server, that is the key to play all those web activities. Apache is extremely powerful application. It is practically the undisputed leader of this type of software and it is totally free and accessible to all operating systems. This server also has many modules that allow you to extend its functionality by creating even web servers that run on Java, Python, etc. and for extending security. (see here the official page)
MySQL is a database. In fact, all web servers need a supporting database in which to store all the information about the content of web pages, paths, configurations, etc.. (see here the official page)

PHP is a programming language particularly specializing in the development and creation of web applications, including a web server. Many web applications run with this language, including WordPress (see here the official page)
Now that you’ve seen the four cornerstones of a LAMP web server, begin to install them one by one on our Raspberry Pi.
But first of all it would be advisable to upgrade your Linux system: Raspbian.
$ sudo apt-get update
$ sudo apt-get upgrade
Installing Apache on Raspberry
Let’s start our installation features of HTTP Server Apache. Installation is fairly simple, just install apache2 package directly from the terminal.
$ sudo apt-get install apache2 -y
Upon completion of the setup features of HTTP Apache server, you must enable it. Then you can restart the Raspbian.
$ sudo reboot
or you can start the service directly by typing
$ sudo service apache2 start
Now that you have the active server you can test its functioning. Just installed, Apache contains a default HTML page that is used to test the correct operation of the system. Run a browser to access to it, and then open this page using the following URL address:
or you can directly enter the IP of Raspberry, especially when you want to try it from another computer in your network.
http://192.168.2.101 (replace this IP with your Raspberry’s IP)
After the page is loaded, you should have a screen like the following:
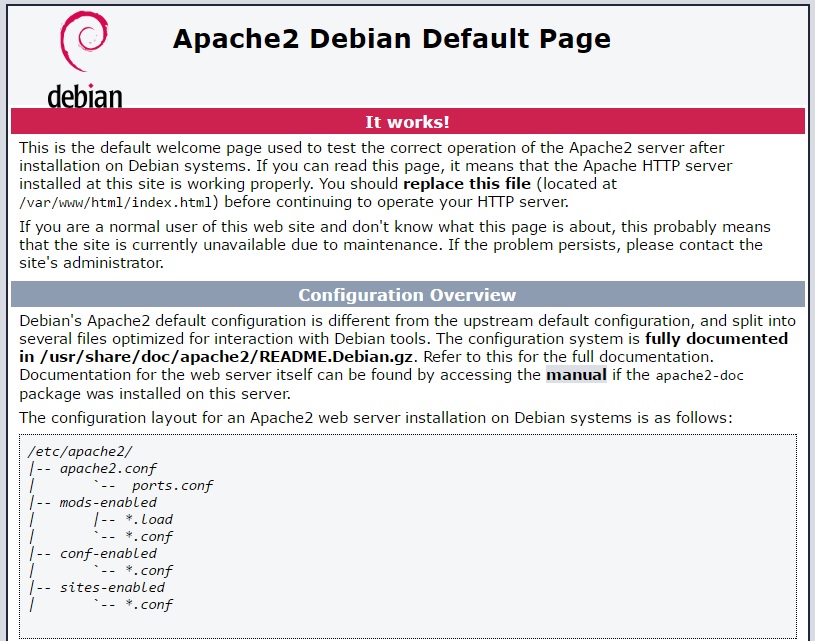
If it appears as the image above it will mean that everything went properly. You can begin to install the next application.
Installing MySQL on Raspberry
Now you can proceed to install your database.
$ sudo apt-get install mysql-server php5-mysql -y
During installation you will be prompted for a password for root. Once completed the installation of the database, you need to restart the Apache service
$ sudo service apache2 restart
As regards the use of a MySQL database there are two possible alternatives:
- database management via the command line
- database management using graphical interfaces (GUI)
For those who want to work at the command line, there is the mysql command that allows you to access all functions via the terminal.
$ mysql -u root -p
enter the password you entered during installation. If all goes well you should see the following prompt
mysql>
waiting for your commands, then the installation will go properly. Enter the quit command to exit.
If you wish to use a convenient GUI client, you can install the MySQL Workbench application (only application that has replaced the previous MySQL Admin and MySQL Query Browser Applications)
$ sudo apt-get install mysql-workbench
The application MySQL Workbench allows you to either manage the database, with all the maintenance tasks, object management and other administrative tasks, and you can view, edit and manage data stored within the database through SQL queries also. Such an application will prove essential if you are going to develop web applications using various programming languages such as PHP, Java and Python.
Installing PHP on Raspberry
Finally, you can start installing the PHP programming language, and all the packages required for its operation in a web server environment.
$ sudo apt-get install php5 libapache2-mod-php5 -y
Once the installation is complete, immediately check if the web server interprets the PHP language properly
From the terminal, go to the directory created specifically to host all the web pages.
$ cd /var/www/html
Note: In previous versions of Raspbian (ad.es Wheezy) the directory is only /var/www/
In fact you all the HTML or PHP pages that you will create in this directory.
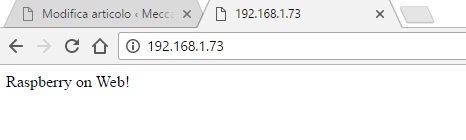
Create an index.php file and write inside this line of code
<?php echo "Raspberry on Web!"; ?>
Save the file and remove (or move to some backup directory) the index.html file. Indeed, this file has the read precedence over index.php.
If you want to try some other interesting command just to test the PHP working, try adding the following lines to index.php.
<?php echo date('Y-m-d H:i:s); ?>
<?php phpinfo(); ?>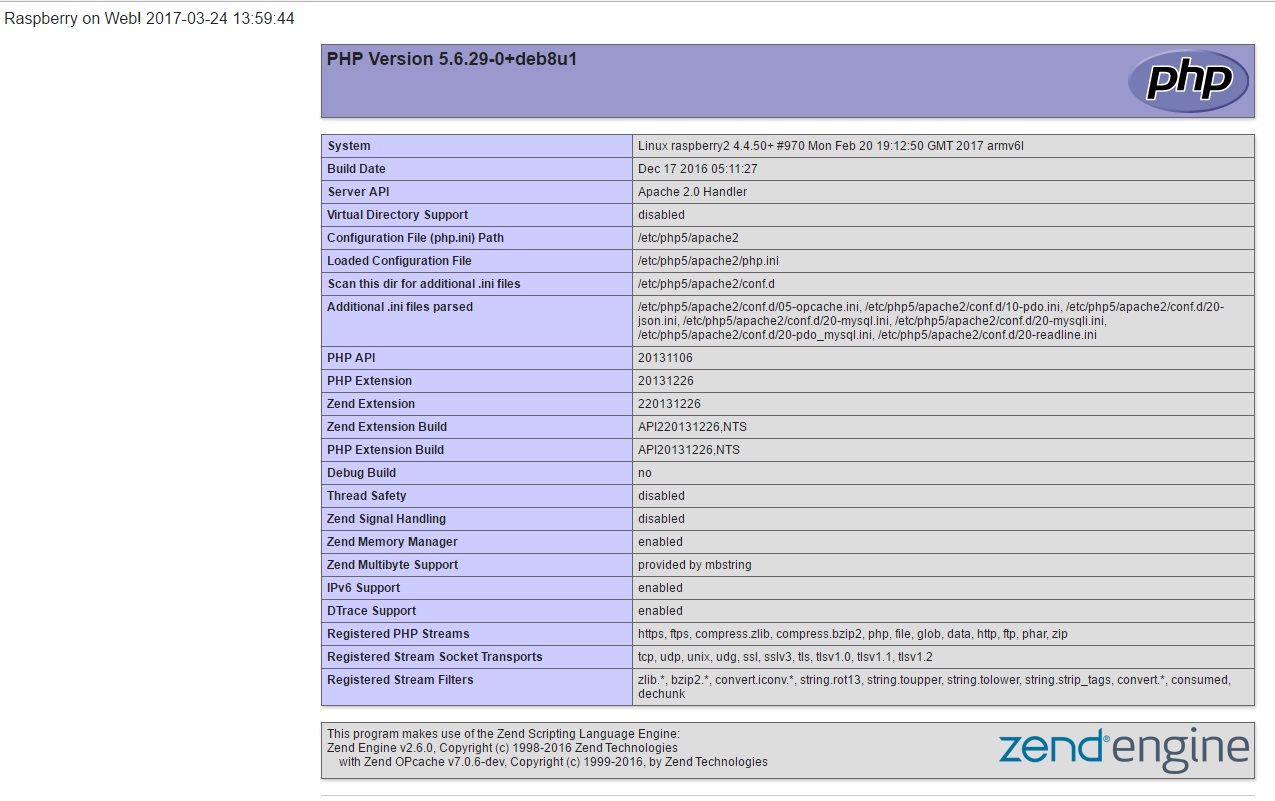
Conclusions
In this article you have seen how quickly set up a Web Server by installing LAMP on your Raspberry Pi. In other articles aspects of Web programming you will be further deepened and you will see how to extend this web server converting it into a Java application or Python server.[:]