Introduction
Welcome to the second part of this article. For those who have not yet read the first part, this is the link:
In this section we will cover the following topics:
- Access to Raspberry
- Update the Raspberry
- The basic commands
Access to Raspi
Locally
After the Raspberry Pi has started, you will be asked for your login details. If you have not changed the password during the initial configuration, the default login is:
- user: pi
- password: raspberry
And you’re ready to work.
Remotely
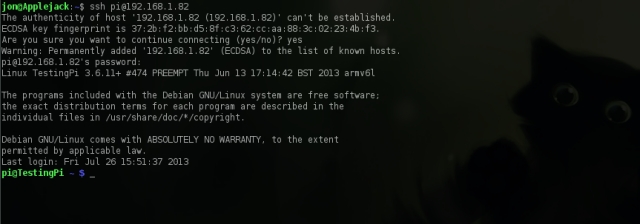
To access to Raspi remotely, you need of the right tools to establish a SSH connection. In Windows, there are several ways, my favorite tool is PuTTY because it is small and works well, but there are for all tastes, just take a look here. If you work with Linux, SSH is usually installed by default (if not, sudo aptitude install openssh-client and you have solved), and you can run it from the terminal with the command:ssh user@serverip
Pi, where are you?
Now in order to connect you need to know the IP address of the Raspberry Pi. Unfortunately most of the routers assign addresses quite casually, so it is not easy to determine the exact address on the first try. To find the Raspi you have two ways: the first is to go through the settings of your router (usually just type the address of the router in the address bar of the browser – it is often 192.168.1.1 – to get to the setup page).
Once you are inside the router configuration you have to browse through the various tabs until you find the DHCP address allocation table or similar.
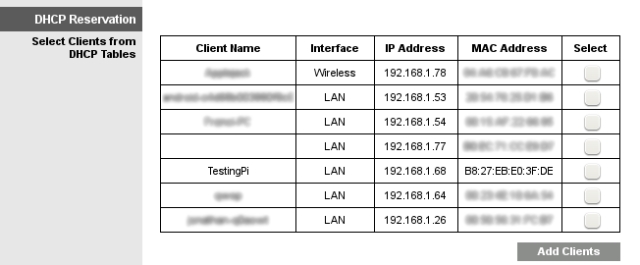
If you have not changed the hostname during setup (as I did) you will find “raspberrypi” in the table. Write down the corresponding address, you will need it to open the SSH connection. The second way to find the IP address of your Raspi is to use nmap. Nmap is a tool designed to scan a network or a machine in particular, to determine which ports and which services are active. I recommend this procedure to all the computer geeks and to those who want to try something new. Nmap is a very powerful program but we will not see it in detail in this article. Thus I recommend you read the reference guide. Instead, if you are a Windows user, download the executable from here (the latest self-installer release), and then install the program by following the wizard. Once it is installed, start it.
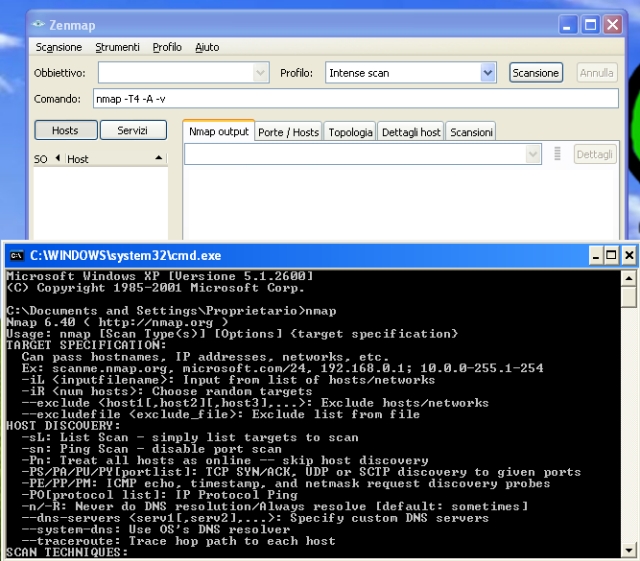
In the “obbiettivo” field (this is the italian settings of Window, you will find the corresponding field in your language) insert the address of your network: you will do a scan of all devices connected to the router. The home network is usually identified with 192.168.1.0/24 (where /24 is the subnet mask of 255.255.255.0), but in some cases it may also be 192.168.0.0/24. To be sure, check the IP address of your computer and replace the last number with a 0. Select the scanning method as fast and then begin the scan.

Fig.3: This is the italian version of nmap
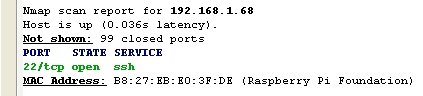
After a few seconds, the program will show a list of connected machines, including your Raspi. You can immediately distinguish him from others because it is the only host with only a open port 22 (SSH) and because the MAC address identifies the manufacturer as “Raspberry Pi Foundation”.
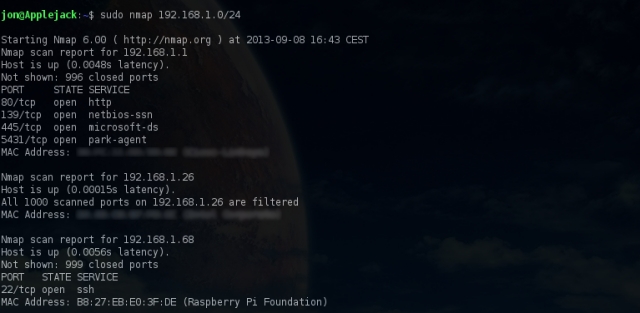
For Linux users, just install nmap with the usualsudo aptitude install nmap
and run the scan withsudo nmap 192.168.1.0/24
The sudo command is not essential, but if you do not use it, nmap does not show the MAC address of the host.
For a complete list of command options:nmap --help
or (better)man nmap
The first access
From Windows, launch PuTTY so that you can access to the Raspberry Pi. Insert the IP address you found earlier and click on Open
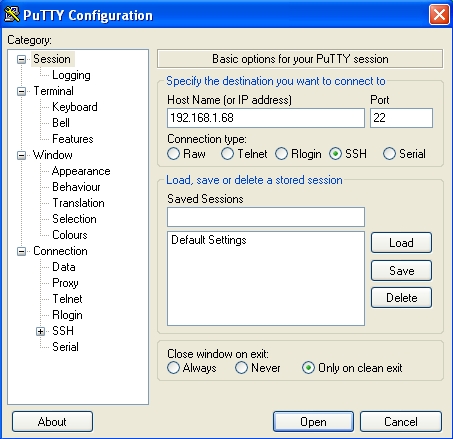
At the first connection, a message appears warming you that the computer does not know the host to which you are connecting, and it asks if it can trust or not. Click on Yes and continue.
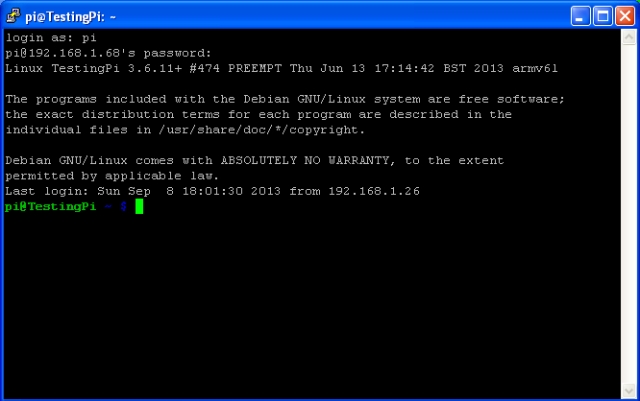
Enter the default user name: “pi“, press [ENTER] and then insert the default password “raspberry” (if you have not changed during the initial setup). Press the [ENTER] again and the Raspberry Pi will welcome us with a bit ‘of information relating to the operating system. From the Linux process is similar to that already described; open the terminal and type:ssh pi@ipaddress
where obviously the ‘ipaddress’ should be replaced with the address of Raspi. SSH will inform you that your computer does not know the host to which you are connecting and therefore it asks for confirmation to continue. Type yes and press [ENTER], and then insert the password when prompted, press [ENTER] and you’re done.
Tips ‘n’ Tricks – part 1
Some tips for making the Pi more convenient to use.
STATIC ADDRESSES
Since every time you turn on the Raspi the router may change its IP address, it is advisable to set a static address (refer to your router’s manual for details on the procedure) so that the Raspberry Pi is always on the same IP address.

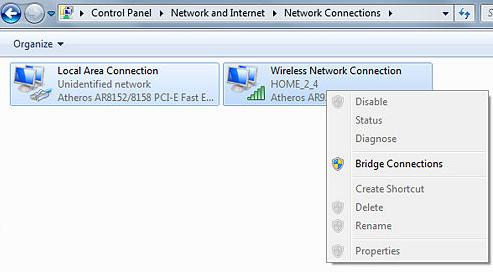
BRIDGING
You do not always have the router near your workbench or where generally you conduct your tests. So you would have to lay an ethernet cable through the whole house … it is not exactly the maximum comfort.
For example, in my case, my PC is connected by WiFi and I need to work on the same desk, away from the router. The solution is simple: just connect the Ethernet port of the PC with that of the Raspberry Pi, and create a bridge between the WiFi interface and the Ethernet interface of the PC. In this way, all traffic coming from the router is turned on the Ethernet port and vice versa. In the Internet there are many guides[+] for making the bridging between two interfaces, and in Windows this procedure is quite simple and painless.
WI-FI
As an alternative to the bridging option, you can buy small WiFi adapters (wifi dongle) to wirelessly connect to the Raspi. This procedure may seem difficult if you are not familiar with Linux, but it is not complex. Furthermore, you can find a lot of guides, just doing a quick search with Google[+].
Updating the Raspi
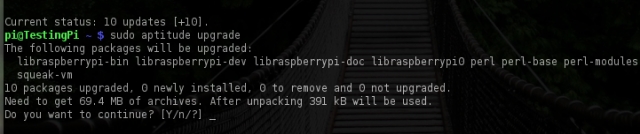
Before you begin, it is good practice to update (and keep) the software of the Raspberry Pi. The operation is automatic and allows us to always have the latest versions of all the programs that we use, first of all Python and its libraries. From the terminal, type the following command:sudo aptitude update
Aptitude is the program to manage updates and packages (software modules). With the command update, aptitude updates its database of available packages. Once the process is ended, run again the command aptitude with the upgrade option.sudo aptitude upgrade
It will update the old software to the latest version. The versions of installed programs are compared with those contained in the database of aptitude, this is the reason why you have to do the update before the upgrading.
Aptitude will show a list of programs which will be updated and then it will ask for confirmation before proceeding. Type Y (which obviously stands for yes) and let aptitude do its job.
We’re almost ready to get started with electronics, but first …
The basic commands
The first time that you have to perform operations from terminal always makes you feel a little out of whack. Copy files, create folders, write a program … How can you do it without mouse? In this section you will quickly see which commands are needed (and also the most common). Always remember that all the commands are provided with a manual, which you can view by running the command:man command
Most commands can also provide a quick list of useful options which can be launched. To read this list you have to use the –help option. For example, run the commandls --help
and you will be impressed by the amount of things the command ls can do. Furthermore, I never get tired of remembering, Google is your best friend. For a smarter way use of the terminal, remember that the commands you entered, are held in memory (up to 1000 if you do not change the configuration of bash) and you can scroll through them in chronological order by pressing the up and down arrows keys. Moreover, if you want to look for a command that you ran a little time ago, you can search for it by pressing Ctrl + R and then typing part of the command.
To scroll through the results, press Ctrl + R until you have found what you are interested. As a final suggestion, Ctrl + U erases everything that was written before the cursor of the terminal. This shortcut is useful when you need to erase long commands without holding the backspace key for ten minutes and when you type the wrong password and you want to delete it entirely.
Interrupting a running program: CTRL+C
If you start a program by mistake or want to interrupt it without waiting for the end of its execution, press Ctrl + C to cancel the process. This shortcut is useful to stop our python scripts if you inserted some endless cycles or if you forgot the command exit( ) at the end of the code.
Turn off the Raspberry Pi: poweroff
When you’re done you should turn off the Raspi using the poweroff command avoiding so to remove abruptly the power supply. The poweroff command requires administrator privileges to be launched.sudo poweroff
The power supply can be removed when all the LEDs except the red (PWR) will be off.
Close the SSH connection: logout
To disconnect from the terminal of the Raspberry Pi without turning it off, just type:logout
Obtain administrator privileges: sudo
In this article you have already seen this command used before other commands. Its purpose is to launch a program with administrative rights (Super User DO). In essence, certain operations such as installing or uninstalling packages, removing system files, changing user permissions, … can only be done by someone who has the necessary permissions.
The command sudo always asks for password to allow a program to run with root privileges (Super User), except if a parameter has been modified to run sudo without asking for anything.

When a program does not run due to lack of privileges, it must be preceded by sudo. Try to do an update using the aptidude without the command sudo; after a list of errors you will be asked: are you root?
Read the contents of a folder: ls
ls (which stands for List) is a simple command that lists the contents of a folder. ls can be launched with or without options. The most common options are:
- -l lists the files in detail.
- -a shows hidden files (all)
- -h writes the file sizes in human-readable format
You can find all the options by typing ls –help.
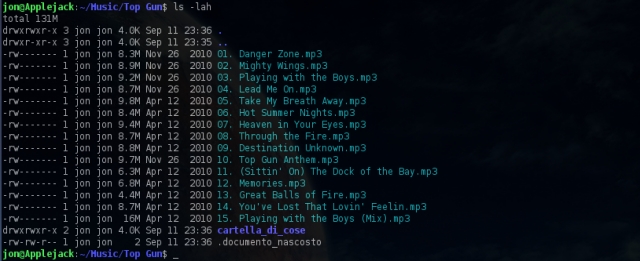
The columns show (from left to right):
- permissions of the file / folder (drwx and the string of dashes); you will see them later
- number of hard links existing for each element;
- user with owner permissions (usually the creator of the file)
- name of the group which has permissions on the file (it corresponds to the user owner)
- size (for folders it is always 4K, being just a link and not an actual file)
- month, day, year (or time if the year is the current one) of the file creation
- name of the file
Remember that files starting with a dot are hidden files and without the -a option they are not displayed.
Change directory: cd
The cd command is used to move between fdirectories (Change Directory). If no directory is specified after the command, it returns to the home directory.
Whenever you login you start from the home directory. It is indicated by the tilde ~ (after user@hostname: and before $). This means that you are in /home/pi or more in general in /home/user. For example, if you want to access to the directory “documents“, (assuming you are in the home directory), you typecd documents/
Be careful not to put the / (slash) before the name of the directory, otherwise “documents” folder will be searched in the root of the whole system which is precisely / (we’re looking for /home/pi/documents, not /documents). To make a comparison with Windows, we can imagine the Linux root directory / such as C:\ in Windows and the /home/pi as C:\Users\pi (or C:\Documents&Settings\pi for the nostalgic). Please be careful to use the uppercase and lowercase letters correctly, cd is case sensitive and it will not find the “My Documents” directory if you write it with a lowercase d. Another useful thing is .. the path that allows us to move up one level in the directory tree. For example, if you are in ~/Documents/programs and you want to come back in ~/Documents, just type cd ..

The current directory (on which you are working) is always written before the $.

Protip: Bash has the magnificent autocomplete function which completes the path names and files without the user having to write everything down. Type cd, write the first letter of the directory you need, and then press TAB twice.
Create and remove a directory: mkdir e rmdir
To create a folder:mkdir documents
To remove it:rmdir documents
Note that rmdir deletes only empty directories, if a directory contains a file (even hidden), rmdir will refuse to proceed. Use ls -a to show all the files (including hidden files).
Create a file: touch
This also is a simple command. It does nothing but create an empty file. To use it, simply invoke the command with the name of the file you want to create, for example:touch script.py
If you try to run ls -l you will find a file with an exciting size of 0 bytes.
Move/rename a file: mv
If you want to move (or rename) a file you have just to invoke the mv command specifying the current file and the new destination:mv script.py oldscript.backup ( it renames script.py in oldscript.backup)
mv script.py documents/script.py (it moves script.py in the documents directory)
You can also move multiple files at the same time as long as the destination is the same. For example, if we wanted to move two scripts in a directory called python:mv script1.py script2.py python/
Or if you want to move all the scripts in the python directory:mv *.py python/
In this way, all files ending with .py are moved.
Protip: you can select all the files that begin or end with the same word or containing the same word using the special character *. Here are some common examples:mv script.* archive/ – moves all files that begin with script, e.g. script.py and script.backupmv *script* archive/ – moves all files that contain the word script, e.g first_script.py, first_script.backup, second_script.pymv * archive/ – moves all the files in the archive directory
Copy a file: cp
This command is used in the same way as mv. Remember that the -r option also allows you to copy the files in subdirectories. If you have two files in documents directory and another in documents/archive, the command:cp -r documents/* backup/
will copy everything that is present in documents into the backup directory. Thus you will also find the directory backup/archive with its file.
Delete a file: rm
Trivially:rm script.py
For a list of options, run the rm command with the option –help.
Change permissions: chmod
The chmod command allows you to change the access mode to a file. When you run the command ls -l , files are listed along with their characteristics. The first column specifies the permissions.-rwxrw-r--
The permissions are read in this way: the first character is a d if the item is a directory, or it is a hyphen – if the item is a file. The other nine characters are divided into three sets. The first represents the permissions the user creator (owner) of the file has, the second is the permissions of the group to which the owner belongs, and the third represents the permissions of all other users of the system. The permissions are described as follows:
- r – read permission (including the scope when you run the ls command)
- w – write permission (you can change/delete the file)
- x – execution permission (you can run the file as command)
Since this topic is quite complex, we will see only the command we need to use with the Pi. For more details read here and here. The most important thing, for the scripts we’re going to write, is to make them executable. By default, when a user creates a file, he has permission to read and write. To make it an executable file, you have just to type:chmod u+x script.py
In this way, you give executing permissions x to the owner (u). Instead, to remove a permission, you will use the same command using – instead of +. For example, the following command will make the file script.py both not editable and not executable.chmod u-wx script.py
Change password: passwd
To change the password you have just to run the command passwd. You will be prompted to enter your current password, the new password and re-enter it again. If all goes well, the wizard will exit without error, otherwise it displays the message: Password unchanged!
With this, the second of three parts of the article ends here. In the next articles you will see:
- how to use the first circuit and the first program in Python with Raspberry
- a series of examples.
So, see you soon!